
From Zero-Basis HarmonyOS Development to App Store Release: A Complete Practical Workflow of ArkTS and ArkUI
This article outlines the complete HarmonyOS development workflow from zero basis to app release, covering the ArkTS and ArkUI technology stack, a four-stage learning path, DevEco Studio environment setup, a practical bookkeeping app project, signing and submission for review, and performance optimization, helping you avoid common pitfalls and complete your first full project.
I promised everyone this content a long time ago. Friends have been urging me in the background, asking: is HarmonyOS really worth learning, and what steps do you go through from zero basis to getting your own app online? This time I simply organized the complete path I have personally walked through, as a solid benefit for friends preparing to dive in. Honestly, HarmonyOS development has changed enormously over the past few years. HarmonyOS 6 is already a pure-blood architecture with a fully self-developed foundation, and the old perception of it being an "Android wrapper" has long been outdated. This article follows the main thread of "zero basis to release" and explains in one go the technology stack overview, environment setup, the ArkTS language and ArkUI framework, complete practical development, signing and release, and troubleshooting. Whether you are a beginner who has never written code, or a developer coming from Android or frontend, following this path will help you avoid most of the detours I took.
1. First Get the Roadmap Clear: What Exactly Do You Need to Learn from Zero to Release
1.1 What Are the Components of the HarmonyOS Development Technology Stack
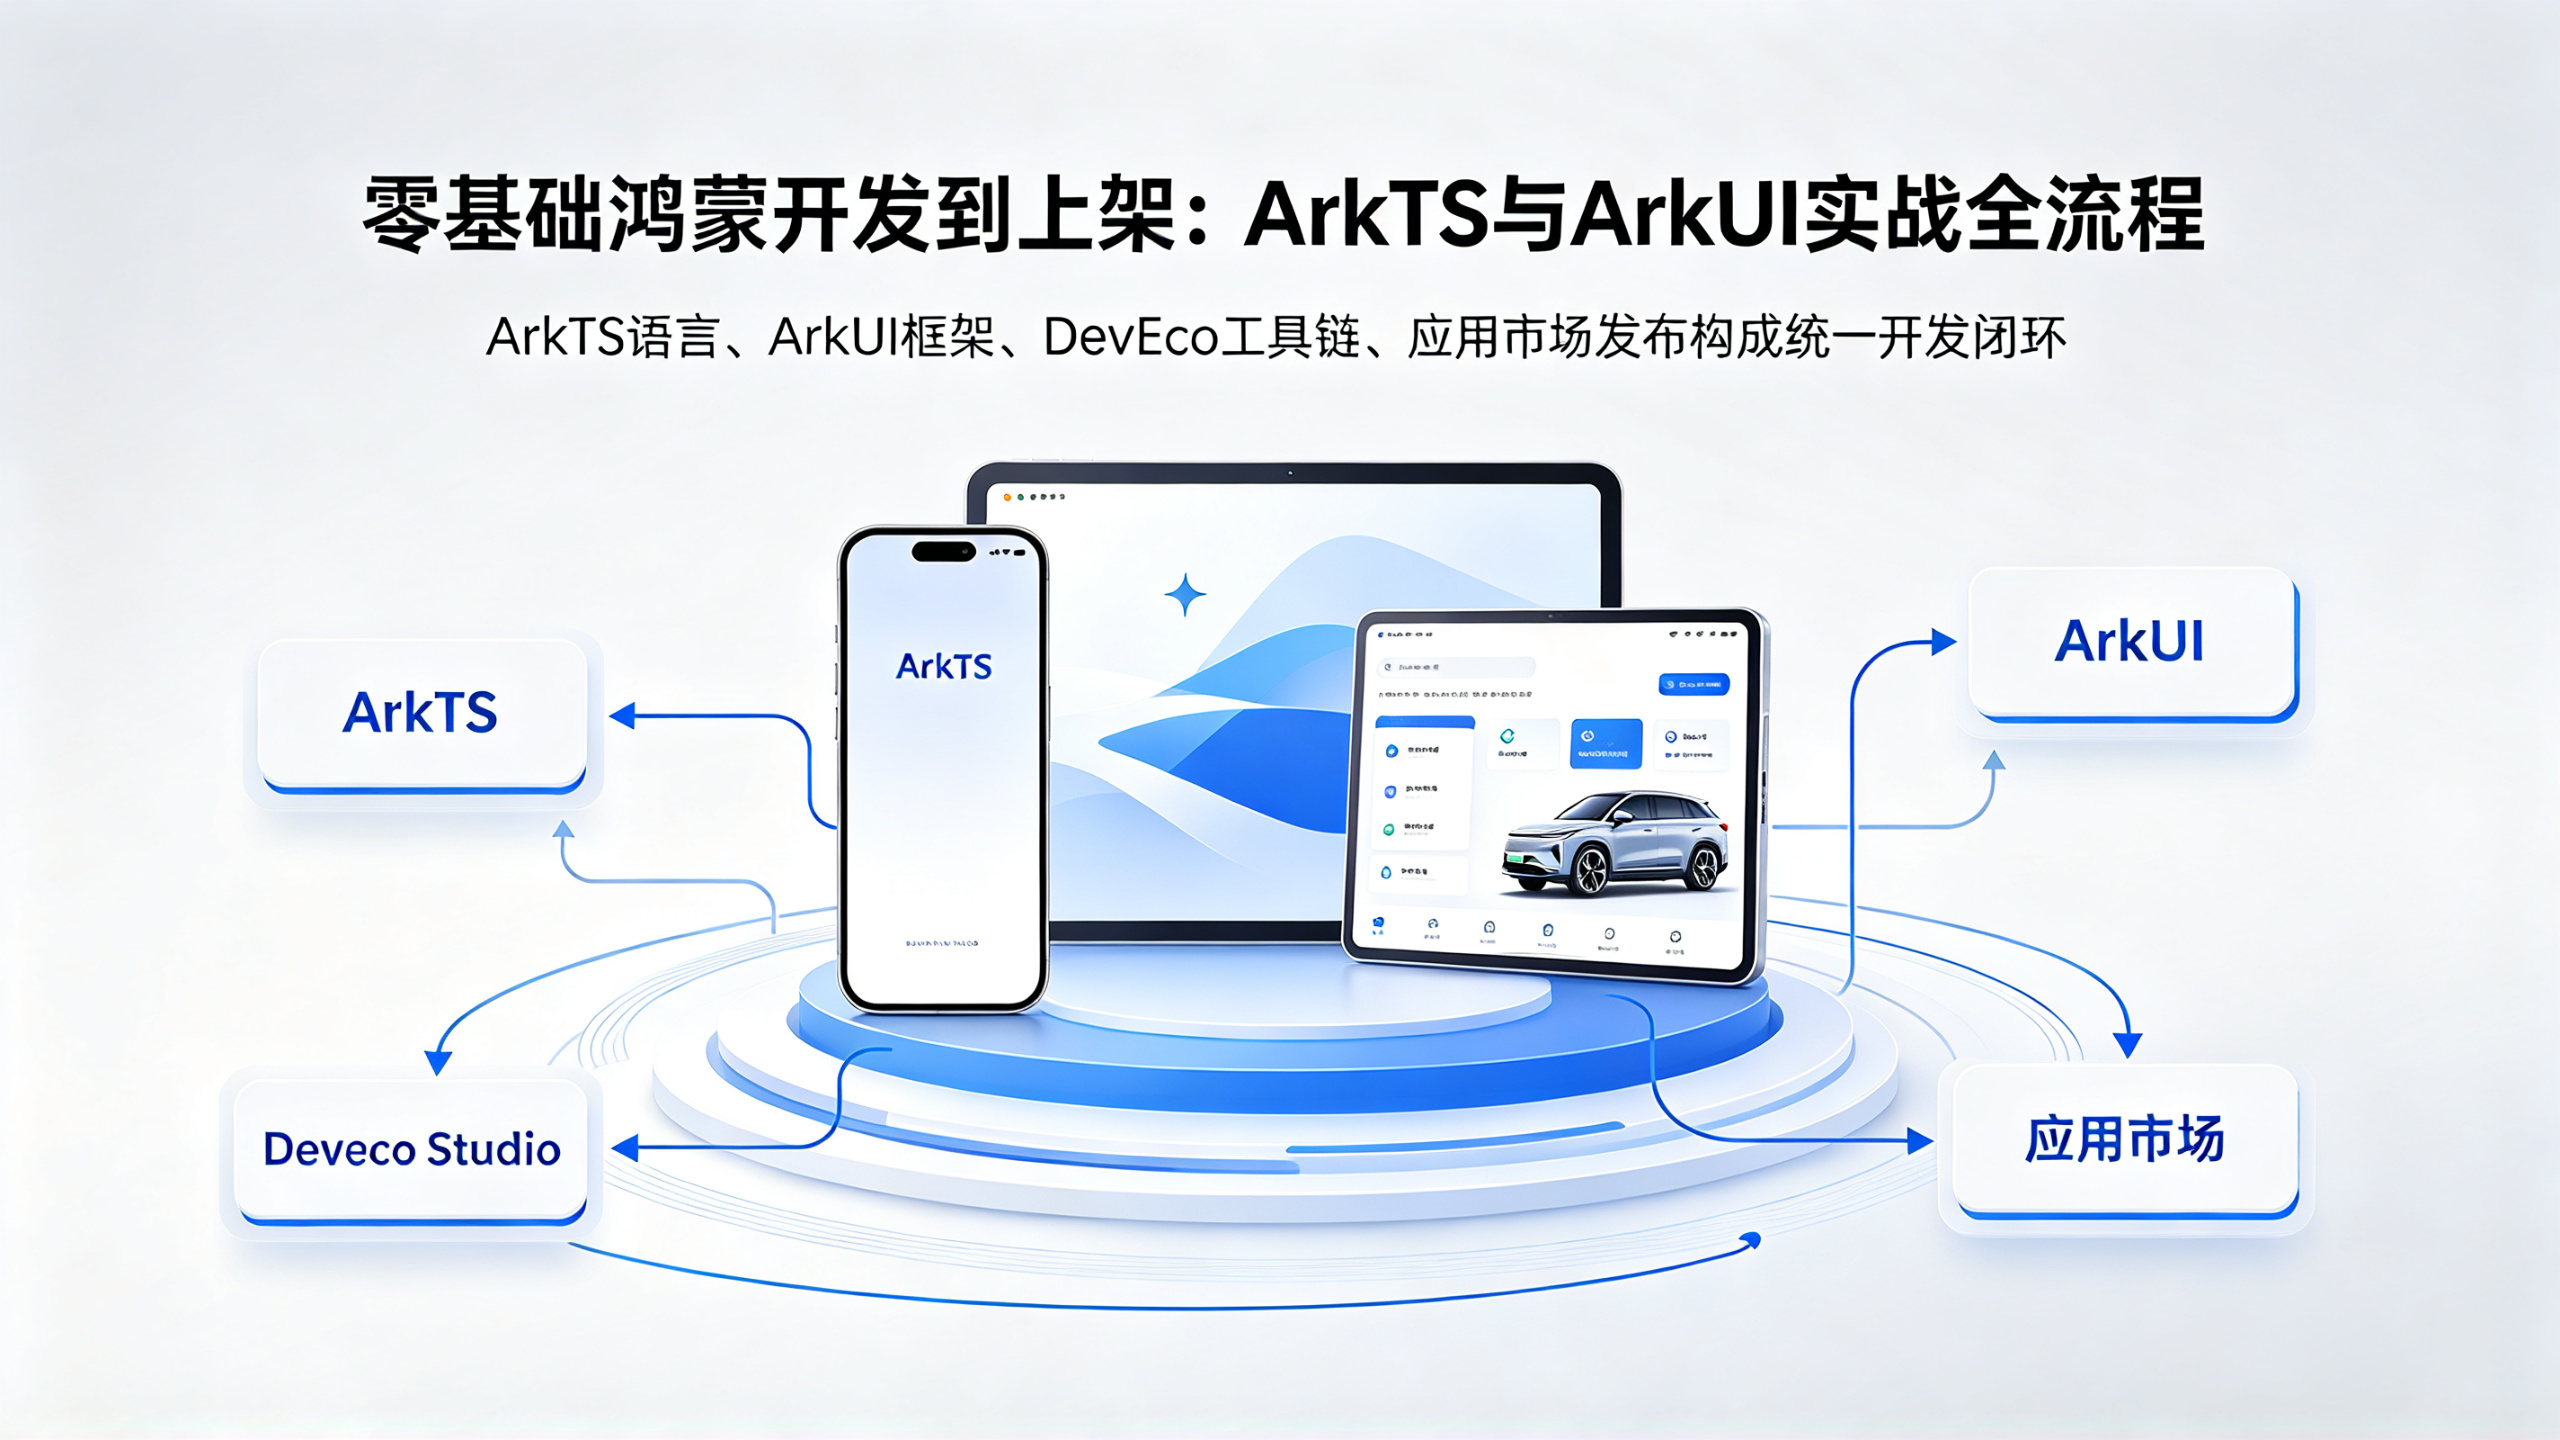
Many people hear "HarmonyOS development" and their first reaction is "isn't it pretty much the same as Android?" That idea no longer applies in the HarmonyOS 6 era. The new generation system uses a self-developed kernel at the bottom, no longer compatible with Android apps, and has shed its historical baggage. For developers, the benefit is that the official team has unified the development paradigm, toolchain, and release channels, so you only need to master one technology stack to develop apps for phones, tablets, foldable screens, car machines, and other multi-device scenarios.
Specifically, this technology stack can be broken down into four parts:
ArkTS: the development language. It strengthens static typing on top of TypeScript and adds capabilities such as decorators. People who have written modern frontend code pick it up quickly, but the type constraints are stricter.
ArkUI: a declarative UI framework. It describes the interface using a component tree plus state-driven approach, rather than operating the interface command by command.
System Capability Kits: a collection of system APIs encapsulated by the official team, providing capabilities such as networking, storage, location, and multimedia categorized by Kit.
Build and release toolchain: including DevEco Studio, signing tools, and the app market backend.
The first two parts determine whether you can write a runnable app, the third part determines the upper limit of the app's functionality, and the fourth part determines whether you can actually deliver the app. These four dimensions will all be expanded on one by one in later chapters.
1.2 Four-Stage Learning Path for Zero Basis
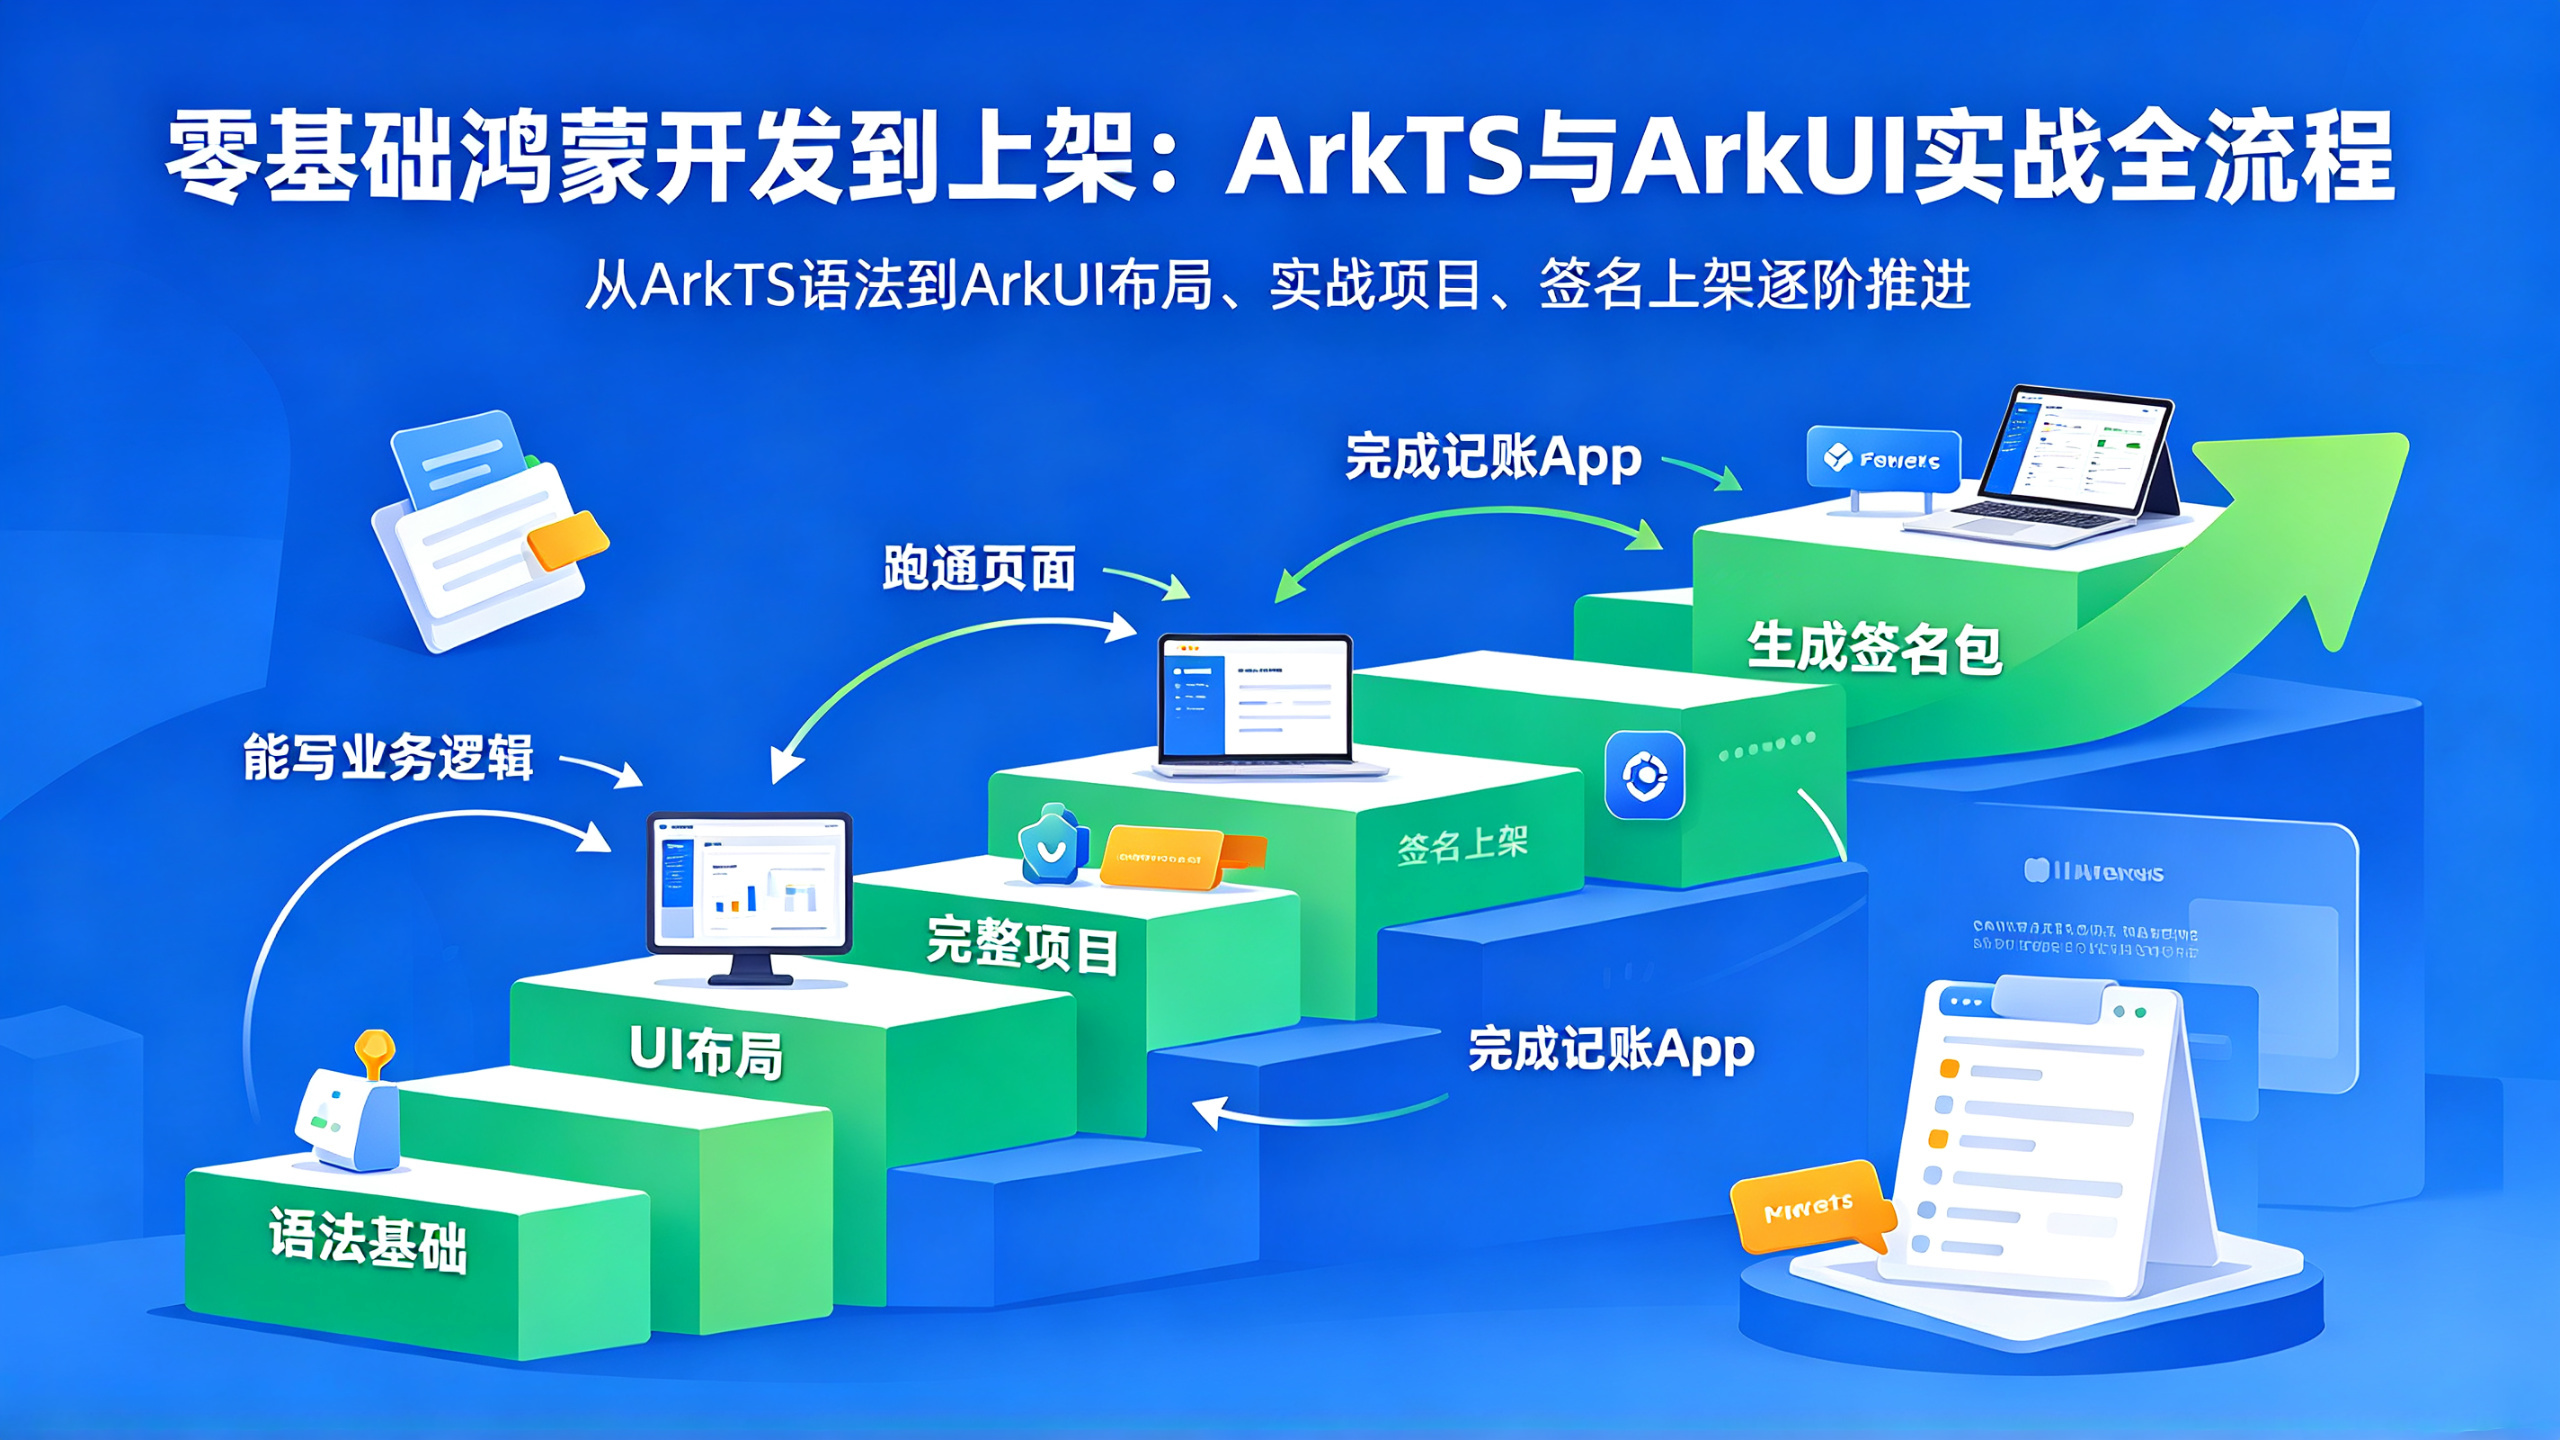
The biggest taboo when learning HarmonyOS from zero basis is to hold the official documentation and grind through it from beginning to end. The documentation is very complete, but it is also really discouraging—after two chapters you get sleepy. The most effective path I have found in practice is to go in four steps, each with a clear output, so learning gives positive feedback, unlike aimlessly scrolling through documentation and feeling less and less confident the more you read.
Stage One: go through ArkTS syntax. The goal is not mastery, but being able to understand official examples and write business logic. Six points must be mastered: variables, functions, classes, arrays and objects, asynchronous programming, and decorators. If you invest two hours a day, you can get through it in about a week. Don't get bogged down; fill in language details as you go.
Stage Two: master high-frequency ArkUI components and layouts. Go through components such as Text, Button, TextInput, Column, Row, List, Scroll, Tabs, and Image, and then combine them with the usage of common attributes such as size, spacing, rounded corners, and background. The goal of this stage is to be able to assemble a static and attractive page, which takes about two weeks.
Stage Three: connect data and interaction. Page routing and navigation, communication between components, network requests, local storage, and permission requests—these are the skeleton of a functional app. After finishing this stage, you can start working on your own small project. By this point you are no longer a "zero basis" learner.
Stage Four: go through the complete release process once. Signing certificates, Profile, packaging, submission for review, and release—operate every step yourself. Many people put this step off until the product is finished before researching it, and then get stuck as soon as they reach submission for review. My suggestion is to go through it in advance in the middle of learning, so that when you really release later you won't be in a rush.
1.3 Pre-Development Preparation Checklist and Time Expectations
Things like hardware and accounts seem trivial, but missing any one of them can block you for several days. For example, insufficient memory causes the emulator not to start, or an unverified developer account prevents you from applying for a certificate—these are places where friends around me have really gotten stuck. To avoid you repeating the same mistakes, I organized the preparation checklist I used at the time into a table:
Preparation Item | Specific Requirements | My Suggestion |
Development Computer | Memory 16GB or more, solid-state drive | Running the IDE and emulator at the same time is very resource-intensive |
Development Tool | Official version of DevEco Studio | Don't use integrated packages or cracked packages of unknown origin |
Debugging environment | At least one of emulator or physical device | Beginners should start with the emulator and leave physical device verification for later |
Developer account | App marketplace developer account | Real-name verification is required; register in advance as a backup |
SDK and images | Automatically configured by the IDE installation wizard | Keep versions matched; do not manually mix and install |
In terms of time expectations, if you invest two to three hours a day, two months is a fairly realistic cycle for a simple utility app that can be published. Among these, environment setup and the shift to declarative UI thinking are the two hurdles most likely to discourage people; once you get past them, the road ahead will be much smoother.
2. Environment setup: DevEco Studio from installation to running your first project
2.1 A few key choices during installation and configuration
DevEco Studio is currently the official IDE for HarmonyOS development. Its interface and operation logic are customized based on mainstream modern editors, so people who have used other development tools can basically get started with zero threshold. The installation process itself is not complicated, but in my experience there are three points I want to highlight. Getting these three right can save you more than half of the hassle later.
First, let the SDK version follow the wizard. The installation wizard generally configures the corresponding version of the SDK, toolchain, and emulator image together for you. Do not take the liberty of changing the default path or mixing in other versions here. When the SDK and IDE versions do not match, compilation will throw a bunch of baffling errors, such as a certain API not being found or build tool version conflicts, and tracking them down is very painful.
Second, adjust the memory configuration in advance. The IDE's default configuration is rather conservative, and it is prone to lagging or even build failures when creating large projects or packaging HAPs. In the project configuration file, you can raise the upper memory limit for the build process. For a machine with 16GB of memory, it is recommended to allocate more than 4GB. Do this once and properly, and you will save a lot of waiting time later.
Third, do not forget to install the command-line tools. Many people only install the IDE graphical interface, and only later when they want to write scripts for automated builds or batch packaging do they realize the command-line tools are not installed. Check that box during installation, and later when you write CI scripts or local automation workflows, you will understand how important it is.
None of these are technical difficulties, but they are typical "one hour to configure, one hour to troubleshoot" steps. Quite a few beginners get discouraged here; in fact, as long as you follow the official installation wizard step by step and avoid taking too many liberties, there will basically be no problems.
2.2 Understand the project structure at a glance
When you create an empty project for the first time, a bunch of directories and files appear in the IDE, and many people are instantly confused. In fact, the HarmonyOS project structure is clearly divided into three layers: Project, Module, and Page.
A project is the top-level container used to manage all modules of an application. A module corresponds to an application or service package that can be built and installed independently. For example, if you make an application, it may contain both a main application module and a desktop card module; they share the project configuration but each produces its own independent installation package. A page is a specific interface within a module, and one module can have many pages.
The directories and files most commonly encountered in daily development are these:
entry: the default main module directory, where most of the code lives.
entry/src/main/ets: the ArkTS source code directory, where pages, components, and utility functions are placed.
entry/src/main/resources: the resources directory, for images, strings, colors, and so on.
entry/src/main/module.json5: the module configuration file, which declares the page list, permissions, icons, and so on.
AppScope/app.json5: application-level configuration, such as the application name and application icon.
My advice to beginners is that spending some time in the first two weeks understanding the directories and files is more important than rushing to write code. Many bizarre errors, such as a blank screen at runtime, are fundamentally caused by forgetting to register a page in module.json5. The configuration file looks like this:
{
  "module": {
    "name": "entry",
    "type": "entry",
    "pages": "$profile:main_pages",
    "abilities": [
      {
        "name": "EntryAbility",
        "srcEntry": "./ets/entryability/EntryAbility.ets",
        "description": "$string:EntryAbility_desc",
        "icon": "$media:layered_image",
        "label": "$string:EntryAbility_label",
        "startWindowIcon": "$media:startIcon",
        "startWindowBackground": "$color:start_window_background",
        "exported": true
      }
    ]
  }
}
The page list maintains all page paths. If you add a new page but forget to register it, compilation may not report an error, but at runtime it will show you a blank screen, and this kind of problem is very hard to locate by eye. So develop the habit of "register a page immediately after creating it," which can help you avoid a large category of hidden bugs.
2.3 How to choose between emulator and physical device
On the trade-offs of the debugging environment, my experience is that beginners should use the emulator without overthinking it. The reasons are very practical: it starts fast, does not occupy a physical device, and you can mess with system settings however you like without worry. The emulator built into DevEco Studio supports common phone sizes and foldable screen forms, and it is completely sufficient for verifying layouts and interaction flows during development.
Real-device debugging is better suited to these scenarios: cases involving sensors or hardware capabilities, needing to verify real performance, needing to test multi-device adaptation, and bugs that cannot be reproduced on the emulator. Before real-device debugging, you need to enable developer mode, then complete device authentication through the IDE. The whole process takes about ten minutes, and the official help documentation is very detailed, so just follow it.
As for debugging tools, the most commonly used are the Log window, HiLog logs, and breakpoint debugging. My working habit is to spread logs through key logic and use them together with breakpoints: breakpoints for viewing variables and the call stack, logs for viewing timing and event tracking. Used in a complementary way, the two give the highest efficiency.
HarmonyOS's logging system clearly separates business logs, system logs, and crash logs. When you encounter a white screen or a crash, first look for the stack in the crash logs. The vast majority of problems can be traced directly to a specific file and line number, with no guessing needed. This habit will make you several times faster than others at locating problems.
3. Core development language and UI framework: a practical understanding of ArkTS and ArkUI
3.1 Why ArkTS, and how it differs from JS/TS
ArkTS is the main development language for HarmonyOS applications, and its basic syntax is highly consistent with TypeScript. But it does two things on top of TypeScript: first, it tightens dynamic features, for example not allowing any to bypass type checking, and requiring object literals to have explicit types; second, it introduces a decorator system, giving declarative UI and state management support at the language level. The overall style is closer to a strongly typed language, and many low-level errors are caught at compile time.
If you have written frontend code before, ArkTS is almost zero-cost to pick up. Variable declarations, functions, arrow functions, destructuring, and array methods are all familiar faces. But a few habits need to change: don't casually write any, and use interface more to define data structures; for asynchronous logic, prefer async/await over nested callbacks; component state variables must be marked with decorators, otherwise changing them won't update the UI.
I suggest readers with zero foundation not grind through a complete TypeScript tutorial separately. Just go through the official ArkTS language basics once, and look things up as you write. With languages, learning by feeding projects is far faster than learning by grinding through books, especially in a fast-evolving ecosystem like HarmonyOS, where learning alongside projects is the only way to keep your information from going stale.
3.2 Declarative UI: from "operating step by step" to "describing what it looks like"
The biggest mental threshold when first learning ArkUI is that you must complete a shift in thinking. The traditional imperative UI style is "get the interface element, then tell it how to change"; the declarative UI style is "directly describe the interface structure, and when the data changes, the framework updates it for me automatically." At first glance the difference seems small, but the actual experience is completely different.
Look at a simplest piece of code:
@Entry
@Component
struct Index {
  @State message: string = 'Hello HarmonyOS'

  build() {
    Column({ space: 12 }) {
      Text(this.message)
        .fontSize(24)
        .fontWeight(FontWeight.Bold)

      Button('更新文字')
        .onClick(() => {
          this.message = '你好,鸿蒙'
        })
    }
    .width('100%')
    .padding(24)
  }
}
What this code does is very intuitive: the page has a text and a button, and after clicking the button the text content changes. The key point is that you don't need to manually call "change the Text content to xxx"; you only change the data this.message, and the UI framework detects the data change and automatically re-renders the relevant components. This is the core mechanism of state-driven UI, and also the foundation for understanding all advanced features of ArkUI.
When writing ArkUI pages, what's in your head is "what components and what layout structure make up this interface," not "how do I draw it step by step." Once you make this turn, reading official examples and writing business pages will both become much smoother. If it feels very awkward at first, don't doubt yourself; this is a transition period everyone goes through, and usually you can adapt in about two weeks.
3.3 State management: from @State to component communication
@State is the most basic state decorator, used to declare a component-internal variable whose "change will cause the UI to update." It's enough within a single page, but a real app almost never has only one component, so data sharing between multiple components has to rely on more mechanisms.
A few that I commonly use in daily development:
@State: component-internal state; when it changes, the current component refreshes automatically.
@Prop: one-way data from parent to child; read-only inside the child component.
@Link: two-way binding between parent and child; changes in the child component sync back to the parent component.
@Provide/@Consume: cross-level component communication, suitable for sharing data between ancestors and descendants.
@Observed/@ObjectLink: listen for changes to fields inside nested objects or arrays.
The selection principle in one sentence: if the scope can be local, don't make it global; for shallow communication levels use @Prop/@Link; for deep levels use @Provide/@Consume; for cross-page sharing, then consider a global state management solution. The most common pitfall for beginners is going global right away, piling a bunch of state together, so that changing one thing affects a whole area, and later maintenance costs explode. Remember, the smaller the state scope, the more controllable the code, and this is an iron rule common to all declarative UI frameworks.
4. Complete hands-on practice: from creating a project to getting features working
4.1 Requirement breakdown and page planning
We've talked through a lot of theory, so next let's walk through the whole process with a concrete example. Suppose we want to build a "daily bookkeeping" app: it can record an income or expense entry, show a bill list, and modify and delete records. Just these three requirements—small as a sparrow but complete in every organ—make it very suitable as your first full project.
Before writing code, do two things. First, break down the pages. My information architecture is simple: the home page is the bill list, one add/edit page, and one detail page. Three pages, three responsibilities, no overlap. Second, break down the components and data flow. The list page uses a List component plus a custom list item; the form page uses TextInput and selection controls; data is stored locally, using Preferences for key-value storage. When a page opens, it loads the list; after adding or deleting, it refreshes the list.
This planning process looks trivial, but it is the part of the whole project most worth spending time on. I've seen too many people start writing as soon as they get the requirements, then discover midway that the page structure is unreasonable and the data flow doesn't make sense, and the rework cost far exceeds ten minutes of upfront planning. Especially on your first project, thinking clearly about the boundaries of pages and data will make the subsequent coding very smooth.
4.2 Core page implementation: list page and form page
The home page bill list is a typical scenario for an information-type page. Use the List component with ForEach to render data, where each record is a custom child component:
@Component
struct RecordItem {
  @Prop item: RecordModel

  build() {
    Row() {
      Column() {
        Text(this.item.title)
          .fontSize(16)
        Text(this.item.date)
          .fontSize(12)
          .fontColor('#999')
      }
      .alignItems(HorizontalAlign.Start)

      Blank()

      Text(`${this.item.amount > 0 ? '+' : '-'}${Math.abs(this.item.amount)}`)
        .fontColor(this.item.amount > 0 ? '#e84026' : '#00b96b')
    }
    .padding(16)
    .width('100%')
  }
}
Here @Prop receives one record passed from the parent component, only for display, without changing data, so the parent-child responsibilities are very clear. The amount color is distinguished by positive and negative, so income and expense can be told apart at a glance. RecordModel is a data structure defined by an interface, containing fields such as title, date, amount, and type. Constraining data directly with types is much safer than passing object literals everywhere.
The add/edit page is a typical form page: TextInput handles entering the title and amount, selection controls distinguish income from expense, and clicking save writes the data into local storage and then returns to the home page to refresh. When writing the save logic, pay attention to validation: the amount cannot be empty and must be convertible to a valid number. If validation fails, give the user a light prompt to avoid dirty data entering the database. This is a point I repeatedly emphasize: data validation must be guarded at the entry point, so that all subsequent logic can safely assume the data is clean.
Page navigation uses routing methods, with parameters passed through params. For example, when clicking a record in the list to jump to the detail page, pass an id over, and the detail page looks up the data itself. When the feature scale is not large, this is the most direct and least error-prone way to pass parameters; there is no need to introduce a complex state management framework for the sake of "elegance".
4.3 Data fetching and local storage
The bookkeeping app has no server, so all data is stored locally. For lightweight local storage I recommend Preferences, suitable for storing configuration and small structured data. The usage is very concise:
import { preferences } from '@kit.ArkData';

const store = await preferences.getPreferences(context, 'my_store');
await store.put('record_list', JSON.stringify(records));
await store.flush();
getPreferences obtains an instance, put writes, and flush synchronizes in-memory data to disk. Here's a real pitfall to warn about: Preferences writes are asynchronous. If you put several times in a row and then immediately kill the process, the later writes may be lost before they hit disk. My habit is to actively flush after every data modification. Although it costs a bit of performance, data safety comes first, and you must develop this habit during development.
When the app's data volume grows and query logic becomes complex, it's time to consider a relational database. HarmonyOS's database API supports standard SQL, and its usage is much like a conventional relational database. However, remember the selection principle: if a lightweight solution works, don't go for a heavyweight one. Don't introduce a database into a utility app that only needs to store a hundred records—that's just making trouble for yourself. Technology selection always serves real needs, not the other way around.
4.4 The three-pronged approach to debugging and locating problems
Development without bugs isn't development. I've summarized my usual methods for locating problems into a three-pronged approach, which basically covers ninety percent of scenarios. This method isn't limited to HarmonyOS, but combined with HarmonyOS's tiered logging system, it works especially smoothly.
The first prong: look at the logs. If a page doesn't refresh or data doesn't match, first add logs at key nodes. Compare the difference between the ideal output and the actual output, and the problem point usually pops out immediately. Focus on whether there are error-level logs and whether they appear on the path you are operating on. Many people's first reaction to a bug is to change code; my first reaction is always to add logs and look at the scene.
The second prong: breakpoint debugging. Reaching a breakpoint means the flow has executed to that point, and whether the variable values are correct is clear at a glance. It is especially suitable for troubleshooting hidden problems in asynchronous callbacks like "you thought it executed but it actually didn't." Use breakpoints together with conditional judgments, stopping only when a specific value appears, which is much faster than searching manually.
The third prong: the minimal reproduction set. When encountering a complex and bizarre bug, first cut the code in half, keep a minimal project that can stably reproduce the problem, then add the code back line by line to locate the line that causes the problem. This method is equally applicable in backend development and frontend development, and is much more efficient than staring at the complete code and guessing. Remember: a bug that can be stably reproduced is a good bug; what's scary is the kind that comes and goes. The minimal reproduction set is also a sharp tool for making intermittent problems stable.
5. Publishing and release: signing, review, and post-launch maintenance
5.1 Application process for signing certificates and Profiles
The first step of publishing is not clicking "package," but getting signing done first. The app market requires every published package to have a legal digital signature, used to prove the app's identity and source and prevent forgery and tampering. The whole process is divided into three steps, and each step has clear verification logic.
Step one: generate a key pair and certificate request file in DevEco Studio through the certificate management tool. The most important thing here is to keep the private key safe. Once the private key leaks, others can impersonate your app's signature, with quite serious consequences. My habit is to back up the private key separately with encryption, not put it in the code repository, and try not to transmit it through chat tools.
Step two: log in to the app market developer platform to create an app, submit the certificate request file, and exchange it for the corresponding app certificate and Profile. A large number of errors in this step stem from inconsistent information: package name, app name, signature fingerprint—if any item doesn't match the project's actual configuration, subsequent verification fails directly. Check item by item before submitting, and you can save repeated back-and-forth.
Step three: import the certificate and Profile in the project build configuration. DevEco Studio's build configuration has a signing settings entry; after selecting the correct files, the build will sign automatically. The first time I packaged, I missed configuring the Profile. It ran fine locally, but when installed on a real device it prompted an installation failure. I spent a long time troubleshooting before realizing it was a problem in the signing step.
So my advice is: during the learning stage, apply for a set of debug certificates and walk through the process completely; when a formal app is to be published, then apply for a release certificate, and you will already be familiar with the whole process. Signing isn't technically difficult; what's difficult is being careful. The more carefully you check information consistency, the smoother things will go later.
5.2 Submission and Release Process and Material Checklist
Once signing is done and the HAP package is generated, the next step is the submission process in the app market backend. This step is often underestimated: the technical work is all done, yet this is where people most easily stumble on materials. After all, technical problems you can debug and search for, but material problems can only be fixed item by item against the requirements, with no shortcuts.
The material checklist is roughly these: app name and icon, introduction, feature screenshots, privacy policy link, permission descriptions, test account (if login is involved). Each item has specific format requirements, such as screenshot size and quantity, copywriting standards, and permission descriptions that must match actual calls. The most common rejection reasons I encountered during submission fall into two categories: the permission request justification was not sufficiently thorough, and the privacy policy did not cover all data collection behaviors. Getting these two areas solid in advance can save you at least one round of review time.
The review cycle after submission is usually not long, so there is no need to be anxious while waiting for the result. Being rejected is not a bad thing either; the reason explanation given in the backend is a clear modification checklist, and after fixing and resubmitting, it generally passes smoothly. I was quite frustrated the first time my submission was rejected, but later I found that each rejection helped me make the product more standardized, and my mindset became calmer.
5.3 Version Iteration and Data Observation After Launch
Launching the app is not the end point; it is the beginning of real operations. After the first version launched, I kept my eyes on three things, and these three things determine whether your App can get better and better.
The first thing: watch crash data and app market feedback. Crash logs reflect online issues, and crashes with a large impact scope should be handled first. Experience issues in user reviews should be organized into a requirement pool and scheduled into iterations by priority. Many developers only look at the number of new users and never look at the crash rate; this puts the cart before the horse. If the experience collapses, users all run away, and acquiring new users becomes meaningless.
The second thing: establish a stable version rhythm. Small, quick steps are safer than holding back for a big move. Fix issues with a small version every week, and release features with a major version every two weeks to a month; users' waiting cost is lower, and the risk surface for problems is smaller. Not updating for a long time makes users feel that no one maintains this App, and a stable version rhythm is itself part of trust.
The third thing: develop the habit of gray release. Push major changes to a small scope first, observe the crash rate and user feedback, and then release fully if there are no problems. Changes involving local data structure changes are especially prone to failure, and gray release can help you keep most online incidents outside the door. As long as the data storage structure changes, I almost always do a gray release; even if the user base is not large, I still develop this process-oriented habit.
6. Quick Reference for Common Problems and Pitfall Avoidance Record
6.1 High-Frequency Errors and Troubleshooting Approaches
I organized the high-frequency problems encountered during development into a quick reference table, so that when you get stuck you can troubleshoot against it. These are almost the "seven deadly sins of beginners" recognized by me and my friends doing HarmonyOS development; encounter one and there is one fewer left:
Symptom | Common Cause | Troubleshooting Approach |
Build fails with a signature error | Certificate or Profile mismatch | Check the bundle name and signature fingerprint, and re-import |
Real device installation fails | Debug Profile is wrong or the device is not authenticated | Check the debug certificate and re-authenticate the device |
Page shows a white screen | Page is not registered or initialization is abnormal | Check the module.json5 configuration and look at crash logs |
UI data changes but does not refresh | Variable lacks a state decorator | Check whether it is declared with a decorator such as @State |
Network request fails | Permission not requested or domain not configured | Check permission declarations and network security configuration |
Emulator startup is laggy | Insufficient memory or image version mismatch | Close unrelated programs and check the image version |
When I encounter an error, my first reaction is always to check the corresponding chapter of the official documentation first, and then search the developer community. For community solutions, first check version compatibility; a solution from a year ago may already be invalid on the new SDK, so adopt it only after checking the version. One more reminder here: do not copy code from old versions wholesale. HarmonyOS APIs evolve very quickly, and some old APIs have already been deprecated in new versions; copying them directly will most likely fail to compile.
6.2 Several Habits to Develop for Performance Optimization
Performance optimization is not something to do only after the project is finished; it is muscle memory to develop during development. By the time the App is laggy and you go to optimize it, you are often already in a situation where one change affects the whole body. The following habits are the ones I have persisted with the longest and that have brought the most direct benefits in my projects.
Use lazy loading well on list-type pages. List naturally starts rendering from the currently visible area, and items outside the screen are not all rendered at once; this mechanism must be matched with correct writing. Do not put heavyweight calculations in ListItem, and do not do time-consuming operations in scroll callbacks; once these places lag, users perceive it most clearly.
Keep the scope of state updates as small as possible. State changes cause component refreshes, and the smaller the scope, the lower the overhead. Put frequently changing state into local components and avoid having one large state drive the rebuilding of the entire component tree. Many people like to hang all data on one large object for convenience, but as a result, every time one field changes, the whole page refreshes along with it; this is a performance killer.
Don't cut corners on image resources. If you can use WebP, don't use large PNGs; list images should come with thumbnails and placeholders. Images are the biggest contributor to memory usage, so the optimization payoff is very direct. I've seen an app where images alone took up half the memory; after switching formats and adding thumbnails, the smoothness improvement was immediate.
Pay attention to resource release. Event listeners and timers must be unbound when the page is destroyed; this is the most common source of memory leaks. Develop the habit of cleaning up resources at the end of the lifecycle, and the earlier the better. Memory leaks aren't as obvious as crashes, but once they accumulate to a certain point they show up as the app getting laggier the more it's used, and troubleshooting them is even more troublesome than crashes.
6.3 Practical advice for those who come after
Finally, a few heartfelt words. When learning HarmonyOS development, the biggest enemy isn't technical difficulty, but information gaps and giving up halfway. The quality of online materials varies greatly; be especially wary of tutorials that still teach old architectures and old ways of writing, where you study hard only to find everything has changed in the new version, which is a real blow to confidence. Sticking to official documentation and official samples is the most effective way to avoid information gaps.
Another suggestion is to build a complete small project as early as possible. No matter how simple the features, go through the whole process from creating the project, writing pages, and building interactions to packaging and publishing; this kind of understanding of the full-chain ecosystem can't be gained from any number of tutorials. I've seen too many people save hundreds of tutorials yet never finish even a decent Demo, which is more of a pity than not learning at all. Tutorials are the map; projects are the real road.
One more thing: read other people's open-source projects more. Reading code is the fastest path to improvement; seeing how others organize directories, handle edge cases, and write utility functions is much faster than fumbling around on your own. After reading, try changing a feature or adding a page; once you've done that, you'll truly know it. Coding ability is never gained by watching; it's gained by modifying.
Probably because I've been caught in the rain myself, I want to hand you all these umbrellas. I hope you'll really put this complete process from zero basics to launching an app to use, rather than letting it gather dust in your favorites. Once you get your first app launched and look back at this article, you'll find that the road you once thought was out of reach really was just a few steps after all.