
Godot Export to iOS and App Store Submission: Troubleshooting Signing Certificates and Xcode Authentication
A complete troubleshooting guide for exporting from Godot to iOS and submitting to the App Store: clarify the developer account, signing certificate, and provisioning profile system, explain the Godot export panel signing fields and Bundle ID configuration in detail, and complete signing, Archive, and upload authentication in Xcode.
"Why did I spend all night on this and Xcode still reports unable to authenticate with app store connect?" Last month, a friend who switched from Unity to Godot got stuck at the step of exporting an iOS package and began to doubt life. He first filled in a bunch of certificate file names in Godot's signing fields according to old online tutorials, and as a result, the exported Xcode project reported a signing error as soon as it was opened; later, when he switched to "automatic signing," it was rejected by App Store Connect because the Bundle ID did not match. In the end, he asked me: "What exactly should be filled in that signing field?"
This problem is actually very representative. The Godot engine has a low barrier to entry. Most beginners develop on Windows, and exporting to Windows, Linux, and Android is especially smooth, but as soon as they get to iOS they are confused. This is because iOS is a closed ecosystem. From developer accounts to certificates and provisioning profiles, and then to Xcode's Archive and App Store Connect review configuration, the entire chain has a pile of established rules, while Godot's official documentation does not explain these "signing details" in much detail. Especially when Chinese and English materials are mixed together, it is very easy to confuse "certificate name," "Team ID," and "provisioning profile."
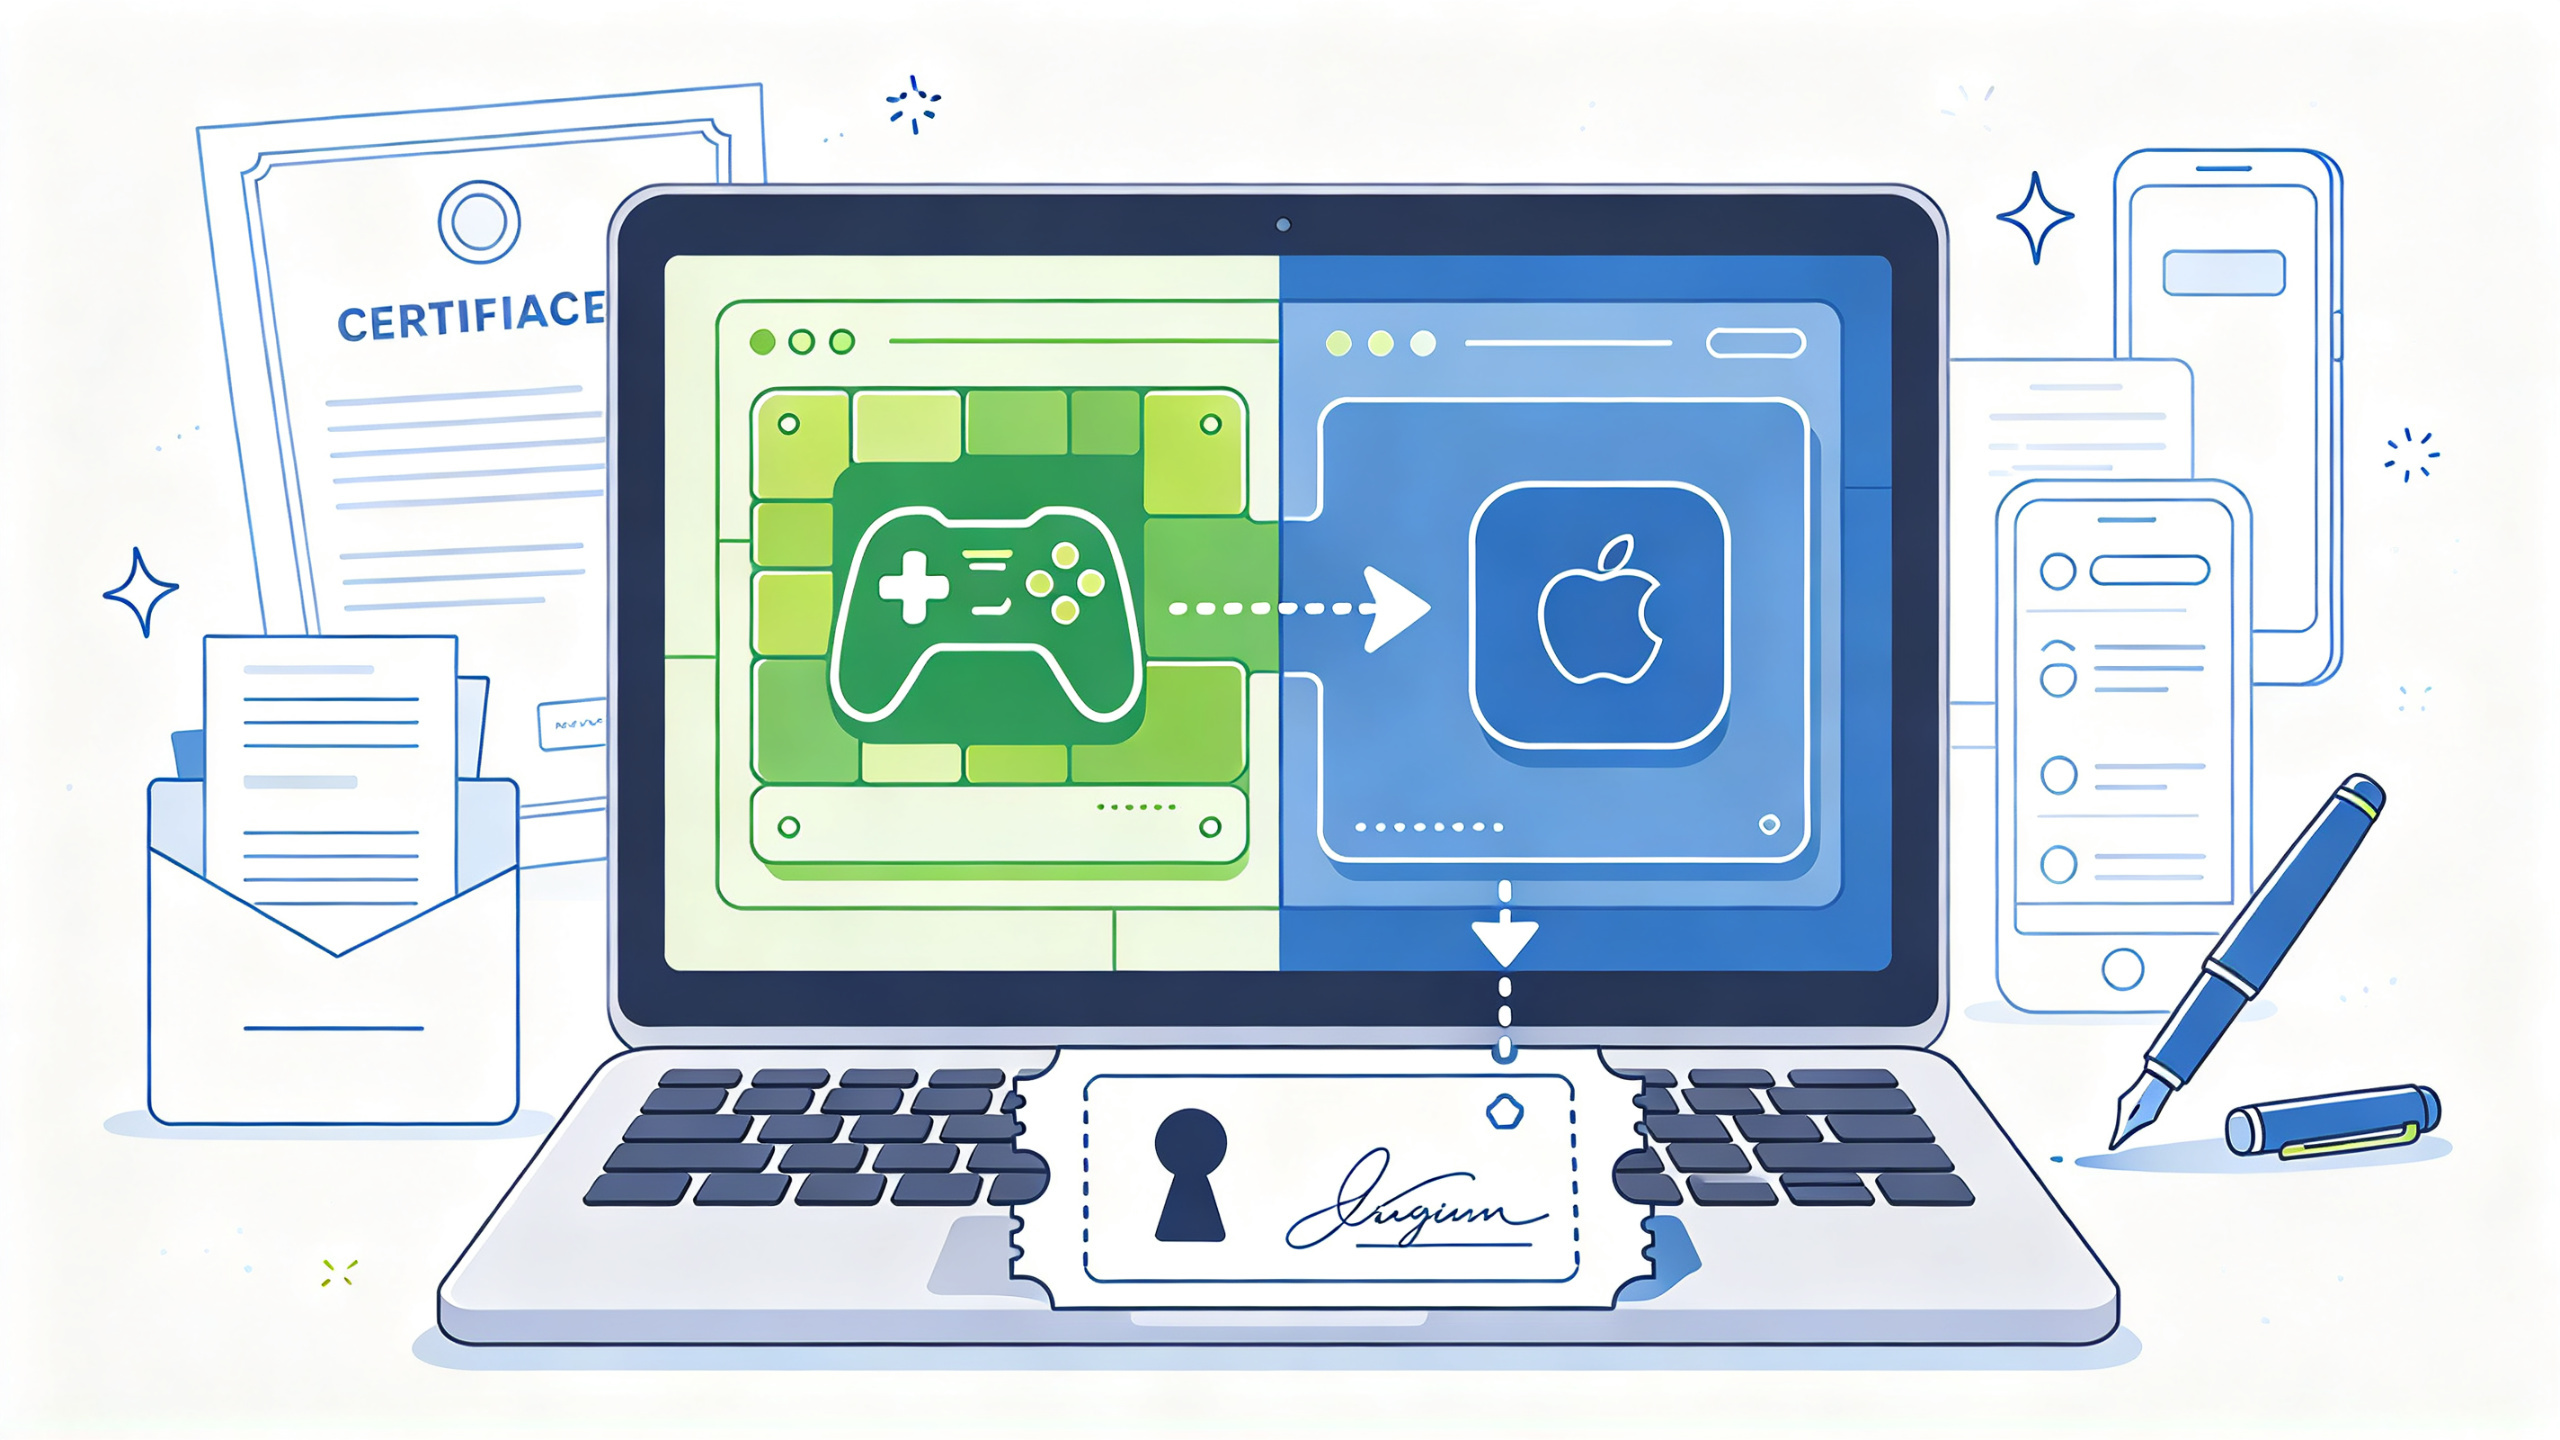
This article is here to break down this entire chain. I will start from zero and go through the complete process of exporting an iOS app from Godot and submitting it to the App Store, focusing on answering the three core questions: "What should be filled in the signing fields," "How are certificates and provisioning profiles generated," and "How do you upload in Xcode," while also listing the pitfalls that are easy to fall into. Whether you are an individual developer preparing to publish for the first time, or a beginner who has already been tortured by Xcode authentication problems for several days, following the steps in this article can save you a lot of trial-and-error time.
1. Before exporting to iOS, first understand this "account-certificate-provisioning profile" system
Many people open Godot's export panel right away, see a long list of signing options, and start filling them in randomly. When they fill them in wrong, they do not know where to find the correct values. So I suggest not rushing to click "Export" first. Spend ten minutes clarifying the three basic concepts behind iOS distribution: developer account, signing certificate, and provisioning profile.
1.1 Developer account: the 99 USD annual fee cannot be bypassed
Apple imposes strict restrictions on the distribution of iOS apps. Whether publishing to the App Store or installing on your own real device for testing, a paid Apple Developer Program account is required (the individual version is 99 USD per year, and the company version has an additional D-U-N-S number requirement). The trending search terms mentioned "ios self-signing 7 days" and "free certificate ios," which belong to temporary personal signing solutions with a validity period of only 7 days, cannot be used to publish to the App Store, and have many functional limitations. I will not expand on those solutions here, because if you ultimately want to publish, you have to take the formal paid developer account route.
After account registration is complete, log in to developer.apple.com, and you can see your team information on the Account page. Remember one key string here: Team ID, which is generally a 10-character alphanumeric identifier, for example in a format similar to "ABCDE12345." It can be found in the upper right corner of the Account page or in the Membership details. This Team ID is the basis for filling in signing information later. Many people confuse it with the certificate name, but they are actually two different things: Team ID is the unique number of your developer account, while a certificate is the electronic credential that "proves you are a legitimate developer of this account."
1.2 Signing certificate: proving your identity
The essence of a certificate is a key pair. Your local keychain stores the private key, and Apple's server stores the public key. Only an app signed with the private key can be published to the App Store or run on a device. It can be created in the Certificates, Identifiers & Profiles section of developer.apple.com. The creation process requires you to provide a CSR (Certificate Signing Request) file, which is generated through the "Keychain Access" tool on a Mac.
In terms of certificate types, there are mainly two used in daily work:
- Apple Development: used for real-device debugging and the development stage. Apps signed with this type of certificate can be installed on iPhone/iPad devices that have been added to the test device list.
- Apple Distribution: used for release, when publishing to the App Store or distributing test packages (TestFlight). The "Distribution" certificate that many projects require you to fill in refers to this.
It should be noted that after 2020 Apple promoted a unified certificate system. Both development certificates and distribution certificates can be uniformly described as "Apple Development" or "Apple Distribution," and after Xcode 12, certificates can be automatically generated and managed. If you manually configure signing in Godot, you need to explicitly create and download these certificate files.
1.3 Provisioning profile: the "license" that binds the App ID and devices
A provisioning profile (Provisioning Profile, referred to as profile) is a configuration package that binds a certificate, App ID, and test devices together. It is a file with the .mobileprovision suffix. A development-stage provisioning profile generally lists the UDIDs of devices allowed to install this app, while a release-stage provisioning profile mainly binds the App ID and distribution certificate.
For the publishing process, what you need to create is an App Store Distribution type provisioning profile, associated with your Distribution certificate and the App ID you want to publish (that is, the Bundle Identifier). After creation is complete, download it locally. Its file path will be used later in Godot's export settings.
2. The overall Godot iOS export process: from project settings to generating an Xcode project
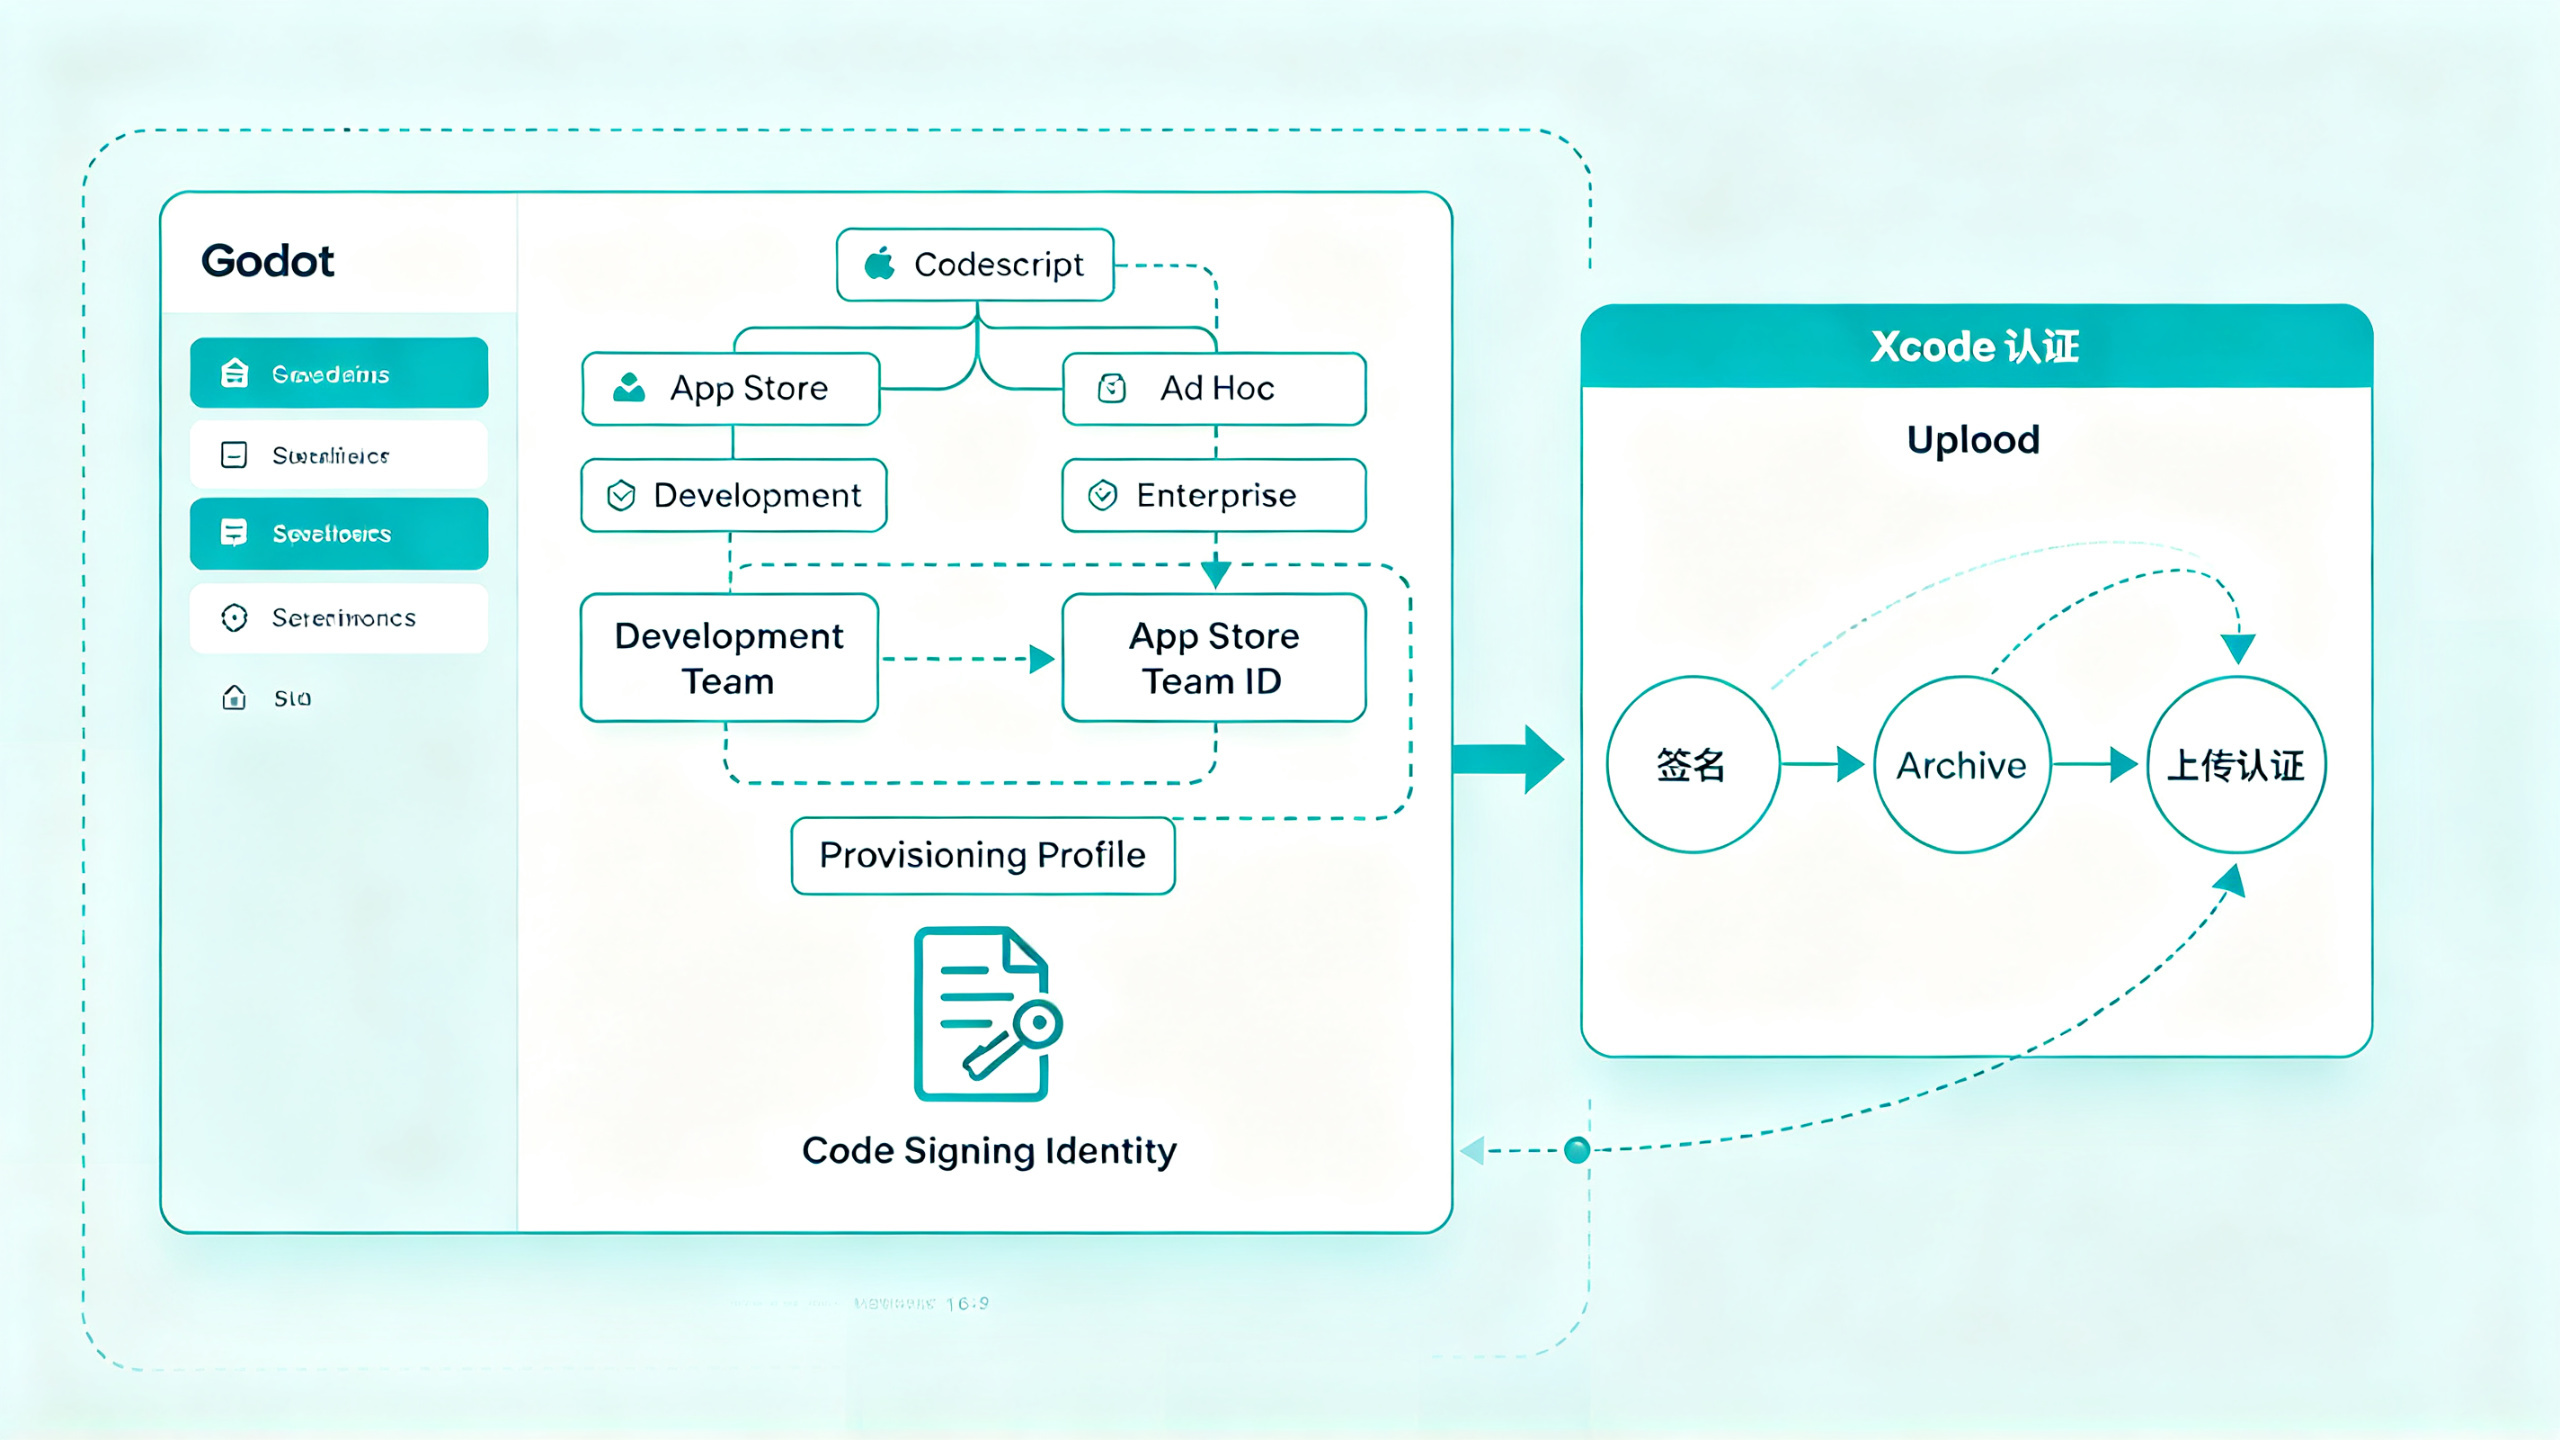
Before we start dealing with signing, let's first look at how the entire technical chain from Godot to iOS works. Similar to exporting an APK for Android, Godot's iOS export does not directly generate an installable .ipa; instead, it first exports a complete Xcode project (or .xcarchive), and then Xcode completes compilation, signing, packaging, and uploading. It is specifically divided into four steps:
- Configure the project's Export Preset in Godot, filling in the Bundle ID, App name, version number, and signing-related information.
- Click Export Project to generate an Xcode project folder containing the Godot runtime and your game resources.
- Open this project with Xcode on your local machine, select the corresponding signing Team, configure the certificate and provisioning profile, and then perform Archive in Xcode.
- Upload to App Store Connect in Xcode Organizer, or upload using tools such as Application Loader / Transporter, and finally App Store Connect receives and processes it.
Some people try to skip Xcode and use the command-line tool xcodebuild directly to build and sign, but this is not recommended for beginners. Xcode's graphical interface can automatically solve many details of signing and entitlements, making things much less troublesome.
So when learning "how to export iOS from Godot," you need to have a clear understanding: Godot is only responsible for packaging the game into an Xcode project, and the actual "publishing" action is completed in Xcode and App Store Connect. For this reason, the approach to solving problems such as "xcode unable to authenticate with app store connect" should also be investigated in Xcode's upload stage, rather than messing around with Godot.
From a project perspective, the Xcode project generated by Godot comes with two Targets: one is the iOS App Target, and the other is the iOS Run Unit Tests Target (if you do not want the test Target, you can turn it off in Godot's export settings). You only need to care about the App Target's signing and build settings.
Also, a reminder: exporting iOS from Godot requires
operating on macOS
. Although you can use Windows to develop game logic and create resources, the step of exporting the iOS package must be done on a Mac with Xcode installed, because the generated project files are essentially an Xcode-style directory structure, and signing requires access to the Mac keychain. If you only have a Windows machine and cannot export for a long time, that is not an operational problem; it is an environment limitation. Some people can also get it working by installing macOS in a virtual machine, but there will be quite a few troubles with performance and Xcode stability. That is another topic.
3. Create an App ID, certificate, and provisioning profile in the Apple Developer backend
Now let's get started. Assume you have already registered a paid Apple Developer Program account and have already installed Xcode on your Mac (Xcode 14 or above is recommended; Godot 4.x does not support older versions of Xcode well enough, and some new APIs will fail to compile). Next, follow the order below to operate in the Apple Developer backend.
3.1 Create an App ID
Log in to developer.apple.com, go to Certificates, Identifiers & Profiles, select the Identifiers section, click the plus sign in the upper right corner, select App IDs, and then click Continue.
The most critical step here is filling in the Bundle ID. The Bundle ID is a string in reverse domain name format, such as com.yourcompany.yourgame. It must match the Application you filled in in the Godot project settings. > Config > It has nothing to do with the "project name (may contain spaces)" under Name, but must be consistent with the Bundle Identifier field in the later Godot export preset. If you have already set the Bundle Identifier in Godot to com.example.demo, then when creating the App ID here you must also fill in exactly the same com.example.demo, with the same capitalization and symbols. Inconsistency will cause signing errors when Xcode compiles, or prompt "no matching App ID found" when creating the App in App Store Connect.
On the App ID configuration page, there will be many Capabilities below, such as Game Center, In-App Purchase, Push Notifications, and so on. If your game needs to use these capabilities, you need to check them here. Note that during App Store distribution, if the App declares use of a certain capability but it is not enabled in the provisioning profile, it is very likely that after submission Apple will determine it to be an "incomplete binary" or "missing a certain feature" and reject it. The capabilities used by the Godot engine itself are generally very few, but if your game integrates in-app purchases, Game Center, or advertising services, it is recommended to check the corresponding Capability.
3.2 Create a certificate and download it to the Mac
Go to the Certificates section and click the plus sign. Select Apple Distribution (for publishing) or Apple Development (for debugging), and then upload the CSR file as prompted. How is the CSR generated? Open the "Keychain Access" app on the Mac, select "Certificate Assistant"->"Request a Certificate From a Certificate Authority," fill in your email and name, select "Save to disk," and you can generate a .certSigningRequest file. After uploading, the backend will generate a certificate file with the .cer suffix. Download it and double-click to import it into the keychain.
After successful import, you can see this certificate in the "My Certificates" category of Keychain Access. Expand the "Private Key" under the certificate to confirm there is a corresponding private key. If there is only a certificate and no private key, an error will be reported when signing; the private key only exists in the keychain of the original Mac that generated the CSR. When developing on a different computer, you need to export it again, or create a new certificate on the new machine.
3.3 Register test devices (only needed during the development phase)
If you are just preparing for release and do not plan to debug on a real device first, you can skip this step. But if you want to run the package exported by Godot on a real device to test performance, you need to add the device to the Devices list. To get the device's UDID, the simplest way is to connect the phone to the Mac with a data cable and open the device management page in Finder, or use Xcode's Window > Devices and Simulators to view it. Copy this UDID string and add it in Devices in the backend. Note that free accounts and paid accounts have different device quotas. A paid personal account can add up to 100 devices. Once a device is added to a provisioning profile, the count cannot be rolled back. Although some devices can be removed, the annual total is limited. So do not casually add devices for old phones that are not often tested; leave some quota for new machines.
A development provisioning profile needs to be bound to a device list, while an App Store distribution profile does not need to be bound to specific devices, so the release process is relatively simple.
3.4 Create a provisioning profile
In the Profiles section, click the plus sign, select the App Store Connect type (also called the Distribution type), then select the previously created App ID and distribution certificate, generate a .mobileprovision file, and download and save it locally. The path of this file is needed in Godot's signing settings. It is recommended to put it in a location that is not easy to delete by mistake, such as the build/ folder under the project directory.
If you cannot find the App ID at this step, it is most likely that the App ID in Identifiers was not created successfully just now, or you selected a wildcard. A wildcard App ID cannot be used for App Store distribution, and you need to recreate an exact-match App ID.
After the entire backend operation is completed, you will have:
- A Team ID (10 characters)
- An Apple Distribution certificate (in the keychain)
- An App Store Distribution provisioning profile (.mobileprovision file)
These three pieces of information correspond to different fields in Godot's export settings. The next step is to connect them.
4. Detailed explanation of Godot export settings: what exactly should be filled in the signing fields
Open your Godot project and click Project in the menu bar > Export to open the export panel. If there is no preset, click "Add..." and select iOS. At this time, a huge configuration panel will appear on the right, with dozens of options. Many beginners are discouraged here. In fact, the vast majority of options can be left at their defaults, and only a few really need to be changed.
Below, we break down the key fields one by one, especially the "signing fields" directly related to the title.
4.1 Basic information: Bundle ID is the top priority
At the top of the export panel, in the "Application" section, there are two fields that are easy to confuse:
- Name: This is the name displayed on the phone's home screen for the App, such as "My Game", and it can contain Chinese.
- Bundle Identifier: This is the App's unique package name identifier, usually filled in as com.yourcompany.yourgame. Note that it only supports letters, numbers, hyphens, and periods. It cannot contain Chinese or underscores (underscores will be rejected in some steps), and it must be exactly consistent with the App ID in the Apple Developer backend.
There are also two fields, Version and Build Number. Version is the version number shown to users, such as 1.0.0; Build Number is the build number, and each time you submit to App Store Connect it must be larger than the previous one, otherwise the upload will fail.
4.2 Signing section: directly answering "what should be filled in the signing fields"
Scroll down the export panel and you will see Code Signing & In the Options section, the following fields are where people get confused most easily.
-
Codescript: This dropdown menu has four options: App Store, Development, Ad Hoc, and Enterprise. Choose App Store for publishing; choose Development for real-device debugging; Ad Hoc is for scenarios outside TestFlight external testing where you "install directly to the device without going through App Store review"; Enterprise is for internal enterprise deployment. In Godot 4.x, some versions name this field "Codescript", while some earlier versions call it "Code Signing". The substance is the same, just choose the right type.
-
Development Team: What you enter here is the Team ID emphasized earlier, that is, the 10-character unique identifier (for example ABCDE12345), not the certificate name, nor the certificate's "Common Name", and definitely not "Apple Distribution". What many tutorials call the "development team" actually refers to this Team ID. If you use Automatic Signing in Xcode, Xcode can fill it in automatically, but in Godot's export settings it will not recognize it on its own, so you must enter it manually.
-
App Store Team ID: In some versions of Godot, when you select Codescript as App Store, a separate App Store Team ID is required here. Its value is actually the same Team ID as Development Team, just distinguished by purpose. Simply copy the same value.
-
Provisioning Profile: This field is not for entering text, but for selecting or dragging in the .mobileprovision file you downloaded earlier. In Godot 4.x, you can click the ellipsis button on the right side of the field and select the downloaded provisioning profile; you can also drag the file directly into the input box. Note: if you choose App Store type signing, select the App Store Distribution Profile here; if you choose Development, select the Development Profile. Do not confuse the two, otherwise even if the export succeeds, you will most likely encounter signing crashes in Xcode.
-
Code Signing Identity: This field can usually be left blank, letting the system automatically choose a suitable certificate from the keychain. If you encounter signing failures caused by conflicts among multiple certificates, you can explicitly specify the certificate name through this field, such as "Apple Distribution: YourName (TEAMID)". But in general, automatic mode is more reliable; manual specification is instead more prone to errors due to abnormal certificate status.
After filling in the above fields, the core signing-related configuration in Godot's export settings is complete. By convention, people call this configuration "GSsigning". Based on a large number of netizens' questions and pitfall feedback, the three points with the highest frequency of actual mistakes are:
- Team ID was filled in as the certificate name or email;
- The wrong type of provisioning profile was selected;
- The Bundle ID is inconsistent on both sides, causing the provisioning profile to not match the App ID.
4.3 Performance and Compatibility Options in Export Settings
Besides signing, there are several options in the export panel that are closely related to post-publishing behavior.
-
Architecture: In Godot 4.x, arm64 is included by default. Since iOS 11, all iOS devices are 64-bit, so just check arm64 here. Do not also check x86_64 unless you also want to generate a simulator version of the package for local debugging. If you check both architectures at the same time, the built package will include the simulator architecture, and when uploading to App Store Connect you will most likely receive an error like "Invalid Architecture". This pitfall is very hidden, because running the simulator locally is fine, but it will be rejected during upload.
-
Export Method: In Godot 4.x there is a distinction between "Export" and "Export Archive". Directly using "Export" generates a .xcodeproj folder; while "Export Archive" generates an .xcarchive file, but this .xcarchive may not be fully signed when generated in Godot, and in the end it still has to be processed through Xcode. My personal suggestion is: choose the ordinary Export project, and then re-Archive in Xcode. For beginners this is more intuitive and easier to troubleshoot.
-
Storyboard: After Godot 4.2, a "Storyboard" option was added, enabled by default. If your game uses certain native UI-related plugins, you may need to adjust it. Most pure game projects do not need changes.
-
Skip Script Compilation: If checked, the exported scripts are not compiled, suitable for use when testing templates. For formal publishing, be sure to uncheck it, otherwise your GDScript will be packaged in uncompiled form and parsed at game startup, and performance will drop noticeably.
-
Icons: Publishing to the App Store requires providing a 1024x1024 App Icon, and it must not contain an alpha channel. There is a dedicated icon setting in Godot's export panel, where you can drag in images of various sizes. If the icon has a transparent background, App Store Connect will prompt during upload that "the icon cannot contain an alpha channel". Don't ask me why I know; once you encounter it, you'll understand.
4.4 Post-Export Verification: Generate an Xcode Project from the Exported Project File
After configuration is complete, click "Export Project", choose the target directory (for example, the build/ folder on the desktop), and Godot will generate a folder containing an .xcodeproj project file named after the game. After a successful export, open this project file with Xcode, and all subsequent work switches to the Xcode environment.
If you selected a provisioning profile during export, Godot will automatically write the reference to the .mobileprovision into the Xcode project's build settings. But based on my actual testing, this reference is not always reliable in some Godot versions; it often happens that after opening in Xcode the provisioning profile field is empty, or it prompts that its validity cannot be verified. So after you open the project, you still have to manually check the signing settings once.
5. The last step in Xcode: change signing, Archive, upload to App Store Connect
After opening the Xcode project, select your main Target in the project navigator on the left (usually the one with the same name as the project), and switch to the "Signing & Capabilities" tab. If you just correctly filled in the Team ID and provisioning profile in Godot, you should be able to see that the corresponding Team has already been selected here. If not, doing it manually is also very simple:
- Check "Automatically manage signing" — this is suitable for most individual developers. Xcode will automatically create and update certificates and provisioning profiles when you are logged in with an Apple ID account. The prerequisite is that your Xcode account (Preferences > Accounts) has already added your Apple ID, and that account belongs to your developer team.
- Select your team name in the "Team" drop-down box.
- Confirm that the Bundle Identifier matches the App ID. Xcode will show a red warning here, usually because of a Bundle ID conflict or a missing provisioning profile. Just click to fix it according to the prompt.
- If you are in manual mode, uncheck "Automatically manage signing", then select Apple Distribution in "Signing Certificate", and manually select the previously downloaded profile in "Provisioning Profile". I recommend automatic signing more, because manual mode has too high requirements for configuration consistency, and if you are not careful you will get strange problems such as expired certificates.
At this point, the signing problem is basically solved. Next, perform Archive:
- First, in the Scheme selector at the top of Xcode, select the device as "Any iOS Device (arm64)", or some simulator under "iOS Simulator" — but note that a package to be published must target "Any iOS Device"; simulator output cannot be uploaded.
- Then select Product in the menu bar > Archive. Xcode will start compiling and generate an .xcarchive archive package. This step is relatively slow, especially the first time, because it has to compile the entire Godot engine code, and it may take 10~20 minutes. If the project references some large resource files, it will take even longer. The trending search term "how to solve Xcode iOS packaging suddenly being very slow" mostly arises at this stage: Java garbage collection is not slow, and compiling once on a new machine is also acceptable, but if you repeatedly Archive in the same project, the accumulation of Xcode's derived data will noticeably slow things down. The solution is to regularly clean derived data: Xcode > Preferences > Locations > Derived Data, click delete, or use the command line xcodebuild clean.
After Archive is complete, Xcode will automatically open the Organizer window, which lists all your Archive archives. Select the one just generated, click "Distribute App" on the right, then choose the "App Store Connect" method in the pop-up window, and click "Upload". Next, Xcode will perform a signing verification, upload, and prompt "Success".
If at this step you encounter an error like "unable to authenticate with app store connect", do not panic first. I have encountered this problem several times already. The common causes are the following; troubleshoot them one by one in order of priority:
- Xcode's login state has expired. Open Xcode > Preferences > Accounts, remove the account and add it again, then restart Xcode.
- Network problem. If you are using a proxy, you can try disabling the proxy, or switch to a more stable network environment. App Store Connect's servers are very unpredictable for some network links; sometimes retrying once fixes it.
- The account has not completed two-factor authentication. Now Apple developer accounts have two-factor authentication enabled by default. If Xcode cannot pop up the verification code window, you can manually enable the "Trust this computer" option.
- Insufficient API Key permissions. If you upload with Altool or Transporter, you need to generate an App-specific password and ensure the account has App Manager permission. When Xcode logs in with an ordinary Apple ID, it may also have only View Only permission and cannot upload. In this case, you need to assign the App Manager role to the account on the App Store Connect users page.
After a successful upload, go to the App Store Connect backend, find the App you created in the "App" list (if there is none, you need to create a new App first, selecting the Bundle ID, name language, etc.), fill in version information, upload screenshots, fill in the privacy policy link and description, select an age rating, and then submit for review. Here are a few points that are easy to overlook:
- Each version needs to provide at least one 6.7-inch and one 6.5-inch screenshot. You can capture them on the Xcode simulator on a Mac, or take screenshots on a real device and then resize them. Screenshots cannot have an alpha channel.
- Game applications must select an age rating. The rating questionnaire involves "whether it contains gambling", "whether it contains violence", "whether it contains pornographic content", and so on. Fill it in truthfully. If the rating is found to be inappropriate after review, it may be rejected or you may be asked to update it.
- The privacy policy URL is required. Even if your game does not collect any user data, you still need to provide a privacy policy page. You can write a simple HTML page yourself and put it on a free hosting platform, as long as the link is accessible.
- Export compliance issue. If your game uses encryption technologies such as HTTPS requests, you need to select "Yes" in the "Export Compliance Information" section of "App Information." The Godot engine's built-in networking module uses TLS encryption, so here you usually select "Yes" and explain that it is only used for standard HTTPS communication.
Once all of these are filled in, click "Submit for Review," and all that is left is a long wait. The normal review cycle is about 1 to 3 days. If it is rejected, App Store Connect will send an email explaining the reason. Common reasons for rejection include: the icon has an alpha channel, screenshot dimensions do not meet the specifications, login is required but no test account is provided, or privacy-sensitive APIs are used but not declared. If a Godot project uses the GameCenter plugin but Game Center is not enabled in the backend provisioning profile, rejection reasons such as "Missing required functionality" may also appear.
6. Real-device debugging and TestFlight: an unavoidable step before release
Although it is not highly recommended, some developers really do submit for review directly without real-device testing, and as a result, after the reviewer installs the game on an iPhone, it crashes on launch and is rejected outright. So I suggest going through real-device debugging at least once before release, or using TestFlight for internal distribution testing. Based on my own project experience, this step will 100% help you avoid some pitfalls that cannot even be found on the simulator, such as CPU architecture issues and dynamic library loading failures.
Real-device debugging requires going back to the Godot export settings, changing Codesign to Development, then creating an Apple Development certificate and a Development provisioning profile in the Apple Developer backend, and adding the device's UDID to the device list in the provisioning profile. After exporting the project, open it with Xcode. Automatic signing mode will automatically download the development certificate for this device. After that, simply click Run in Xcode, and the app will be installed on the phone and launched.
Uploading to TestFlight is basically the same as uploading to the App Store. After archiving, in the "Distribute App" pop-up in Organizer, select "App Store Connect." This itself includes the function of TestFlight distribution, because after uploading to App Store Connect, you can first add that build to a TestFlight test group in the backend, and after testing confirms there are no issues, submit it for review. So one upload can be used both for internal testing and for submission for review, which is very convenient. But note that TestFlight external testing also requires review, and the external testing link can only be opened after at least one review has been passed.
Many people ask at this step: "The package exported by Godot runs fine on the simulator, so why does it crash as soon as it runs on a real device?" There are two common reasons: first, the x86_64 simulator architecture was selected during the build, so it cannot run on a real device; second, the signing does not include a provisioning profile for the real device, so the system refuses installation. Therefore, before real-device debugging, be sure to confirm that arm64 is checked under Architecture in the Godot export settings, and that the provisioning profile includes the UDID of the real device.
7. Problems you are very likely to encounter: garbled text, slowness, inability to authenticate
In the final chapter, I will write about several high-frequency issues, all of which have been repeatedly asked about by friends around me and in the community.
7.1 After exporting from Godot, Xcode compilation reports garbled text
The search term "godot game garbled text" appears quite frequently. Many friends write Chinese on Windows and then export to iOS, only to find that the Chinese in the game displays as garbled text. This is mostly not an export problem, but a font problem. The default font included with Godot 4 has incomplete Chinese support on some iOS devices. You need to specify a custom font that supports Chinese for controls such as Label and RichTextLabel in the project settings, such as Source Han Sans, WenQuanYi, and so on. Put the font file into the project and set it in the Theme or in the Font property of an individual control, and then it will not be garbled after exporting.
If garbled text appears in Xcode's compilation output, then it is generally a file encoding issue. Check whether your GDScript files are saved as UTF-8 and check Xcode's localization settings. In most cases, it is enough to disable the display abnormalities caused by custom fonts.
7.2 Packaging is slow, Archive gets stuck and does not move
The Godot engine has a large amount of code, so it is normal for the first Archive to be slow. But if subsequent Archives also become slower and slower, it is recommended to check the following points in order:
- Turn off Xcode's Index function: Xcode > Preferences > General > Turn off Enable indexing? This option does not have a direct switch in newer versions. You can use File > Workspace Settings to turn off Build indexing or change "Debug" to "Release." Compilation is faster in Release mode, and the output is smaller.
- Clean derived data: Xcode > Preferences > Locations > Derived Data, right-click and delete.
- Check whether there is enough disk space. Xcode compilation intermediate products are very large, and when less than 10GB of space remains, it is easy to get stuck at the linking stage. Use tools like Clean My Mac to clear Xcode caches, or directly run xcrun simctl delete unavailable in Terminal to delete useless simulators.
- Confirm whether your Mac has Low Power Mode enabled. On a laptop in low battery mode, Xcode compilation can become so slow that people mistakenly think it has frozen.
7.3 xcode unable to authenticate with app store connect: the final solution
I already mentioned this error once above, but because its probability of occurring is really too high, it is worth summarizing a separate troubleshooting checklist.
Symptom | Possible cause | Solution |
"unable to authenticate" when uploading | Xcode login session expired | Remove the account and log in again, restart Xcode |
"unable to authenticate" when uploading | Network proxy/firewall blocking | Turn the proxy on or off, switch network environment and retry |
"Your session has expired" prompt when uploading | Account requires two-factor authentication | Use an App-specific password, or check "Trust this computer" |
Upload fails halfway through, no clear error | Unstable network | Use Transporter to upload separately, without relying on Xcode's Organizer |
Still processing 48 hours after upload | Large package processing or Apple server queue | Wait patiently, do not upload repeatedly |
I've encountered uploads getting stuck before too, and in the end I used Transporter (App Store Connect's official upload tool) to get the .ipa uploaded. You can first have Xcode generate the .ipa file after Archive completes (in Organizer, choose "Export" to export the ipa), then drag it to Transporter to upload, bypassing Xcode's authentication chain. However, this isn't a standard operation, so it's listed here as a fallback option.
8. Some personal hands-on experience
Back to the question at the beginning. Godot's exported signing really isn't as "fill in whatever" as Android, but it's also not as mysterious as the internet makes it out to be. To sum it up:
- The "Team ID" filled in the signing field is the account number, not the certificate name.
- Choose the correct provisioning profile type (App Store or Development), and make sure it matches the App ID.
- Ensure that the Bundle Identifier in Godot's export settings is consistent across all three: the Apple Developer backend and the App Store Connect backend.
- In Xcode, prefer Automatic Signing and let the tool manage certificates and provisioning profiles for you; it's much less hassle than manual configuration.
If you get these three things right, you can basically avoid all the pitfalls in the signing fields. What you encounter later will be nothing more than minor details like Xcode login session, network connection, and icon alpha channel, which can be solved by following the troubleshooting table above step by step. The biggest cost on the path to publishing isn't time, but trial and error. I hope this step-by-step guide, written based on actual project experience, can help you avoid some detours and successfully get your Godot game into the App Store.